There are lots of ways to convert WordPress from HTTP to HTTPS, and the ways it is accomplished have changed significantly over the years. I have now upgraded a few dozen WordPress websites to HTTPS and I will outline the basics below.
Will Moving WordPress to HTTPS affect SEO?
A proper WordPress migration will have a either no impact on SEO, or a small positive impact on SEO. However, common mistakes will negatively impact SEO.
First of all, I would not move WordPress to HTTPS unless it is going to benefit you or your users. If you have a basic business website and/or a blog and there is no sensitive data changing hands and no users logging in, you really do not have to have HTTPS. Still, Google has stated it is a (tiny) SEO benefit. No, changing to HTTPS is not going to magically boost your rankings. But, if you are in a competitive niche, every tiny bit helps, just like getting that last 3lbs of weight off of your NASCAR vehicle. Some people also trust the site a little more. The trick is to avoid common mistakes when migrating and properly configure a Google Search Console property asap.
Common SEO mistakes:
- Not redirecting the old site properly. If you upgrade to HTTPS and do not 301 redirect the entire old domain, you are in trouble. Link juice to pages will not be passed along and you will have a lot of duplicate content. This is because you are basically operating two sites now. An HTTP version of a site and an HTTPS version of a site are basically treated like 2 completely different domains.
- 302 redirects. Again, not properly 301 redirecting web traffic and telling search engines that pages have permanently moved is a critical error.
- Non-SSL elements on an HTTPS site. No green lock symbol? Oops. This will display scary error messages and your users will run for the hills.
Popular WordPress Plugins
- Easy HTTPS Redirection. Download Easy HTTPS Redirection here. If you are configuring a brand new domain using HTTPS you probably do not need this WordPress plugin. If you are migrating an existing site, you will either need good .htaccess skills or this plugin. The plugin allows for 2 things.
- Redirection from HTTP to HTTPS. “Use this option to make your webpage(s) load in HTTPS version only. If someone enters a non-https URL in the browser’s address bar then the plugin will automatically redirect to the HTTPS version of that URL.”
This plugin adds this code to your .htaccess file which looks like this:# BEGIN HTTPS Redirection Plugin RewriteEngine On RewriteCond %{SERVER_PORT} !^443$ RewriteRule ^(.*)$ https://%{HTTP_HOST}%{REQUEST_URI} [L,R=301] # END HTTPS Redirection Plugin - The plugin can also force resources to use HTTPS versions. On this site, I have thousands of images, and this handy plugin made sure all of them load in HTTPS with a click. The feature in the plugin reads “When checked, the plugin will force load HTTPS URL for any static resources in your content. Example: if you have have an image embedded in a post with a NON-HTTPS URL, this option will change that to a HTTPS URL.”
- Redirection from HTTP to HTTPS. “Use this option to make your webpage(s) load in HTTPS version only. If someone enters a non-https URL in the browser’s address bar then the plugin will automatically redirect to the HTTPS version of that URL.”
- WordPress HTTPS (SSL). You may very well be able to get by with just the above plugin, but if you need an alternative, check out WordPress HTTPS (SSL). It hasn’t been updated in a couple of years and you can very likely get by without this plugin.
- Yoast SEO. Yoast SEO will generate your new HTTPS Sitemap to submit in Google Search Console.
Selecting an SSL Certificate
In 2016 and 2017 a free SSL cert has been gaining popularity: Let’s Encrypt. I haven’t used it. Yet. It is a great option if you need something free but there are pros and cons to it. I work mostly with attorneys, law firms and small businesses and a PositiveSSL certificate @ $49/yr is a great option via Comodo. I will cover this some more in bits and pieces below throughout the rest of this article.
In a nutshell: A paid SSL DV (Domain Validated) certificate requiring manual installation is going to save you time and if your time is worth the $49, buy a certificate.
If you are migrating a larger site, multiple subdomains, or ecommerce sites, you may want more than a “DV” certificate. This is going beyond the scope of this article but in a nutshell, a higher level certificate lets browers know the organization itself has been verified. There may be paperwork involved and the process is much less automated. You can learn more about additional organizational certificates here.
Example #1: Installing a SSL certificate on WHM / CPanel with Comodo PositiveSSL
Once you have followed the steps below, you can begin the migration of your website to HTTPS. In the example below, I used Comodo’s PositiveSSL.
- Go to PositiveSSL or your favorite SSL dealer and buy your certificate.
- Generate a SSL Certificate and Signing Request via WHM

- Submit your CSR to your SSL provider
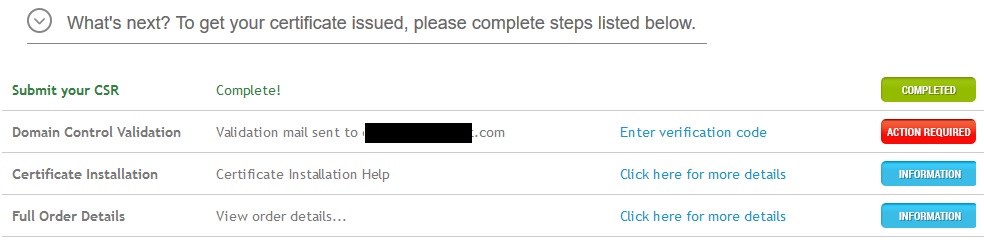
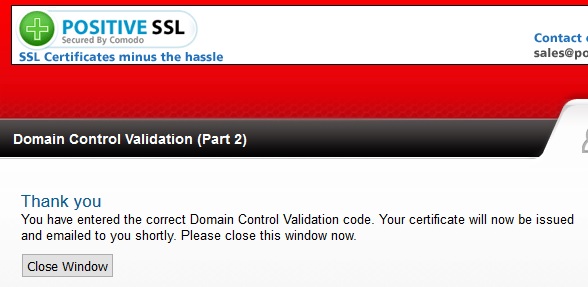
- You will get your Domain Control Validation email containing a verification code. This is sent out to admin contacts on your domain name, even if private registration is enabled. Enter it with your SSL provider to continue the process:
- You will then be sent your SSL certificates. It should look like www.domain.com.crt. You will also receive an Apache bundle file, ending in .ca-bundle.
- FTP upload your SSL certificate into the correct \SSL\certificate folder which will be in your root (1 step above the WWW folder).
- Test the site by visiting the HTTPS version and using an SSL Checker. (the site should appear in HTTPS with errors and the SSL checker should display your cert)
- Move on to making the switch to HTTPS.
Example #2: Installing a SSL certificate with GoDaddy “Standard SSL DV”
In this example I am using GoDaddy for a law firm in San Francisco.
- Select your SSL certificate from GoDaddy here and buy it.
- After 4 or 5 minutes you can “manage” your SSL. It will be “pending”:

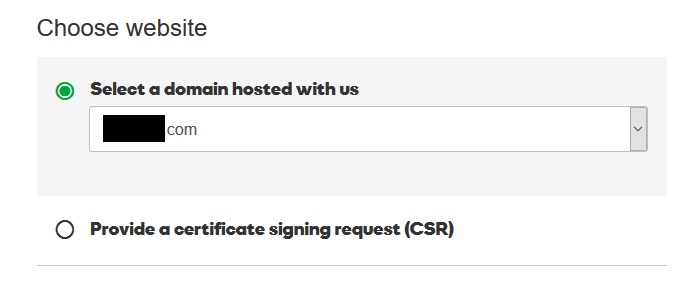
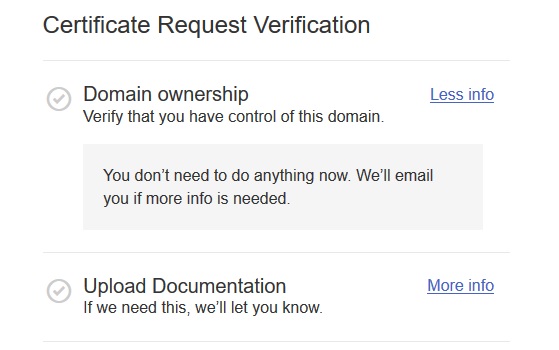
- When you go to manage it you can “verify” your domain. This is the domain verification process. If you already have your site registered with GoDaddy, you don’t have to generate a CSR, which is nice.
- Wait for GoDaddy.
- 10 minutes later or so you will receive an email from GoDaddy telling you that your SSL certificate is now active. No need to FTP in and upload any certificates.
- Test the site by visiting the HTTPS version and using an SSL Checker. (the site should appear in HTTPS with errors and the SSL checker should display your cert)
- Move on to making the switch to HTTPS.
Example #3: Let’s Encrypt Free SSL Certificate on SiteGround
Above I was a little biased against the free SSL certificates by Let’s Encrypt. However, I am now adding this third example now that SiteGround has an amazing service which allows you to simply click a button to get an SSL certificate. This is huge!! The certificate is free and you don’t have to worry about renewing it. I wrote an entire article about my experience here: How To Install HTTPS on WordPress at SiteGround using Let’s Encrypt SSL (For Free!).
If you need solid WordPress hosting, SiteGround will actually move your WordPress site to their servers for free, too! And the tech support is amazing. Their WordPress hosting starts at only $4.95.
Below is the short version of the story:
- Buy SiteGround hosting here.
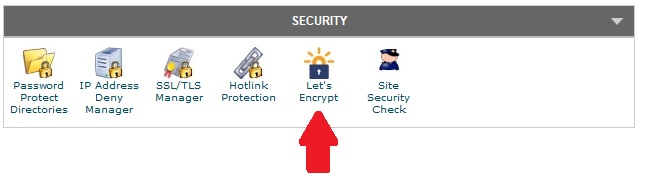
- Log in to your SiteGround cPanel, scroll down to the “security” tab, select “Let’s Encrypt!”.
 In about 15 minutes, your SSL certificate will be installed in the server.
 - That’s it! You now have SSL and may continue.
Making the actual switch to HTTPS
- Now that you have your SSL certificate uploaded and your tools in hand, go ahead and visit the HTTPS version of your site. You should be able to access it. It will have errors in the address bar, but it should still work.
- Log in to the WP Admin and activate the plugin mentioned above. If it worked right, HTTP pages should now redirect to HTTPS.
- If your site is like mine, you are going to want to change the URL of logos and images and social icons and junk in the footer to HTTPS. This should only take a few min as the plugins will convert most for you.
- Go to the “General Settings” section in WordPress and change your URLs to HTTPS:

- Test inner pages of the site. Visit pages on the blog. Try to bring up the HTTP version. Make sure you are redirected to HTTPS.
- Make sure you aren’t getting SSL errors in the address bar.
- Fix up Google Search Console and Analytics (more on that below).
Google Search Console and Google Analytics
Your new HTTPS site is like a whole new domain to Google. You would think you could just tick a little box in Search Console or Analytics. Nope.
- Add your HTTPS site as a brand new property in both Search Console and Analytics, then tie them together.
- Do not delete your “old” HTTP site in Search Console or Analytics.
- Update your GA code on your website.
- Have GSD crawl your new HTTPS sitemap.
- GO.
If you have not screwed up anything in this document, you should see that there is no negative SEO factors involved in migrating to HTTPS. Over the coming days and weeks you will see your HTTP URL in search results changing to HTTPS.
Not covered but worth mentioning
This is by no means the “ultimate” how to. But it should be of help to some people. There is a lot a I skipped over. Here are a few things beyond the scope of this article:
- CDN. If you have a content delivery network, you will need to fiddle with CDN stuff.
- Old HTTP Javascipt and things. This is usually not an issue but if you have old scripts on your site you may need to fiddle with them.
- PPC. You will want to upgrade your links in AdWords and what not.
- Inbound links. I personally do not worry about them. If you are able to update them, like on your Yelp profile, etc, do so. Otherwise if people have linked to your HTTP site, not a big deal.
- Feeds. If someone or some thing was picking up your RSS feed it may be all jacked up now.
- Social share counts. After an HTTPS migration these will all show zero. If you care about them you will need to fix them.
Comment below.
Please feel free to chime in below. Let me know what I missed or or tell the world about your trials and tribulations or going senile with HTTPS migrations. Heck, ask a question. If you need assistance contact me.
- Google “Pure Spam” Penalty Deindexes Sites March 6 2024 - March 12, 2024
- What Happened to ChicagoNow.com? - August 30, 2022
- The December 2021 Google Local Pack Algorithm Update - December 17, 2021


Hey Len, good article. I recently did the conversion on a wordpress site in January. For the most part the hosting providers helped with implementation on the server. All I had to do was what you mentioned above and the plugin did most of the heavy lifting.
Where I did have the problem was with my CDN, but a quick call to support and they were able to get me on the road in a few minutes after re-routing and configuring my account. I love going to other sites and seeing the non-secure warning and knowing my visitors don’t see it on mine.
Follow up, what are your thoughts on all of the http: back-links built to people’s websites. The website will redirect, but do you think an abundance of those unsecured links pointing in could impact anything?
Hi Joel,
The backlinks pointing to the HTTP version of the site are completely ok, not a problem at all. If you are able to control them, I would change them to HTTPS as you bump into them. For example, if you have your URL on your Yelp page or Facebook page, you could update those, but I wouldn’t lose any sleep over any that are difficult to change or out of your hands.
Thank you for your comments!
Len
Great post.It’s impressive and also helped too.Thank You . keep going .
Good work man!Will keep this in mind that how to upgrade WordPress to https and it does not affect on our SEO!because honestly I really don’t know about it. So Thank you so much for sharing article on this topic.